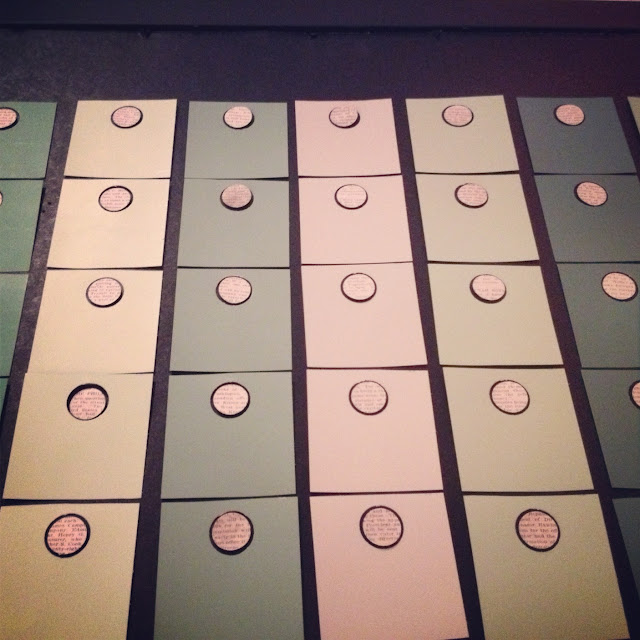
This project I am going to share with you was made for my husband's grandmother. She is always a challenge to buy for because she has Alzheimer's disease and has difficulty with change. Last year we bought her a pair of slippers and a purple glasses case to replace her current case which was frayed. She became upset when we tried to replace her glasses case, even though I found one very similar, and the slippers didn't fit. You have no idea how much thought I had put into trying to find something that she needed or wanted. This year I wanted to do better. She currently lives in an assisted living facility and likes to only use and wear the things she has had for years. In her adorable apartment she has a calendar where we write down events and when we visit her. She also has many large printed notes posted on her walls as reminders, such as, "Dinner is at 4 pm." I thought that I could make those things a little nicer and more functional for her and those who care for her. I chose to make her a calendar and framed dry erase boards to replace all of the yellow signs on her walls.
What you need:
32 X 34 frame (Mine was 50% off at Hobby Lobby)
6 paint chips each of 7 colors (Better Homes and Garden brand for the ones with holes pre-punched)
1 piece of scrapbook paper
scissors
circle punch
glue dots
For "optional" wire words and letters:
thin aluminum wire
set of jewelry tools
First, I made a trip to the paint section of Walmart to pick up some paint chips. I chose 7 colors and chose 6 of each color.
I punched out all of the perforated circles.
I chose to cut each one into a square. I used the words as a guide of where to cut but I'm sure using a paper cutter would of better smarter. To get my black background I just flipped the back of my frame and used the black side instead of the cardboard side.
I lined up all of my squares and just taped them on with rolled scotch tape so they were re-positionable.
I used the side of my scrapbook paper as my straight edge to line up my squares.
Once they were all lined up I realized that you would not be able to see the date numbers with the black circle background. To fix that and add a little more flair I came up with a solution.
I circle punched my scrapbook paper and added glue dots to each one.
I just placed each circle in the center of each circle.
Next, I bent aluminum wire into letters for each day of the week and for the word "month."
I put them above each column and used one cut up glue dot to stick on the letters and the word.
I used my leftover swatches to make the little shape where you can write the current month.
It's all in the details.
I plan to use overhead projector markers instead of dry erase markers because then they won't smudge when you add things to them throughout the month. I'll add a picture when I fill it in!
I really hope she likes her present this year!
This project was shared on the following blogs:


What a thoughtful gift. I am sure your husband's grandmother will love this present. Thanks for sharing. We will be featuring this on the blog, by the way ^^)
ReplyDeleteHugs,
Lelanie
She actually did like it! I was so thrilled. Thanks for featuring us again! We love your blog! :) Lacey
Delete